


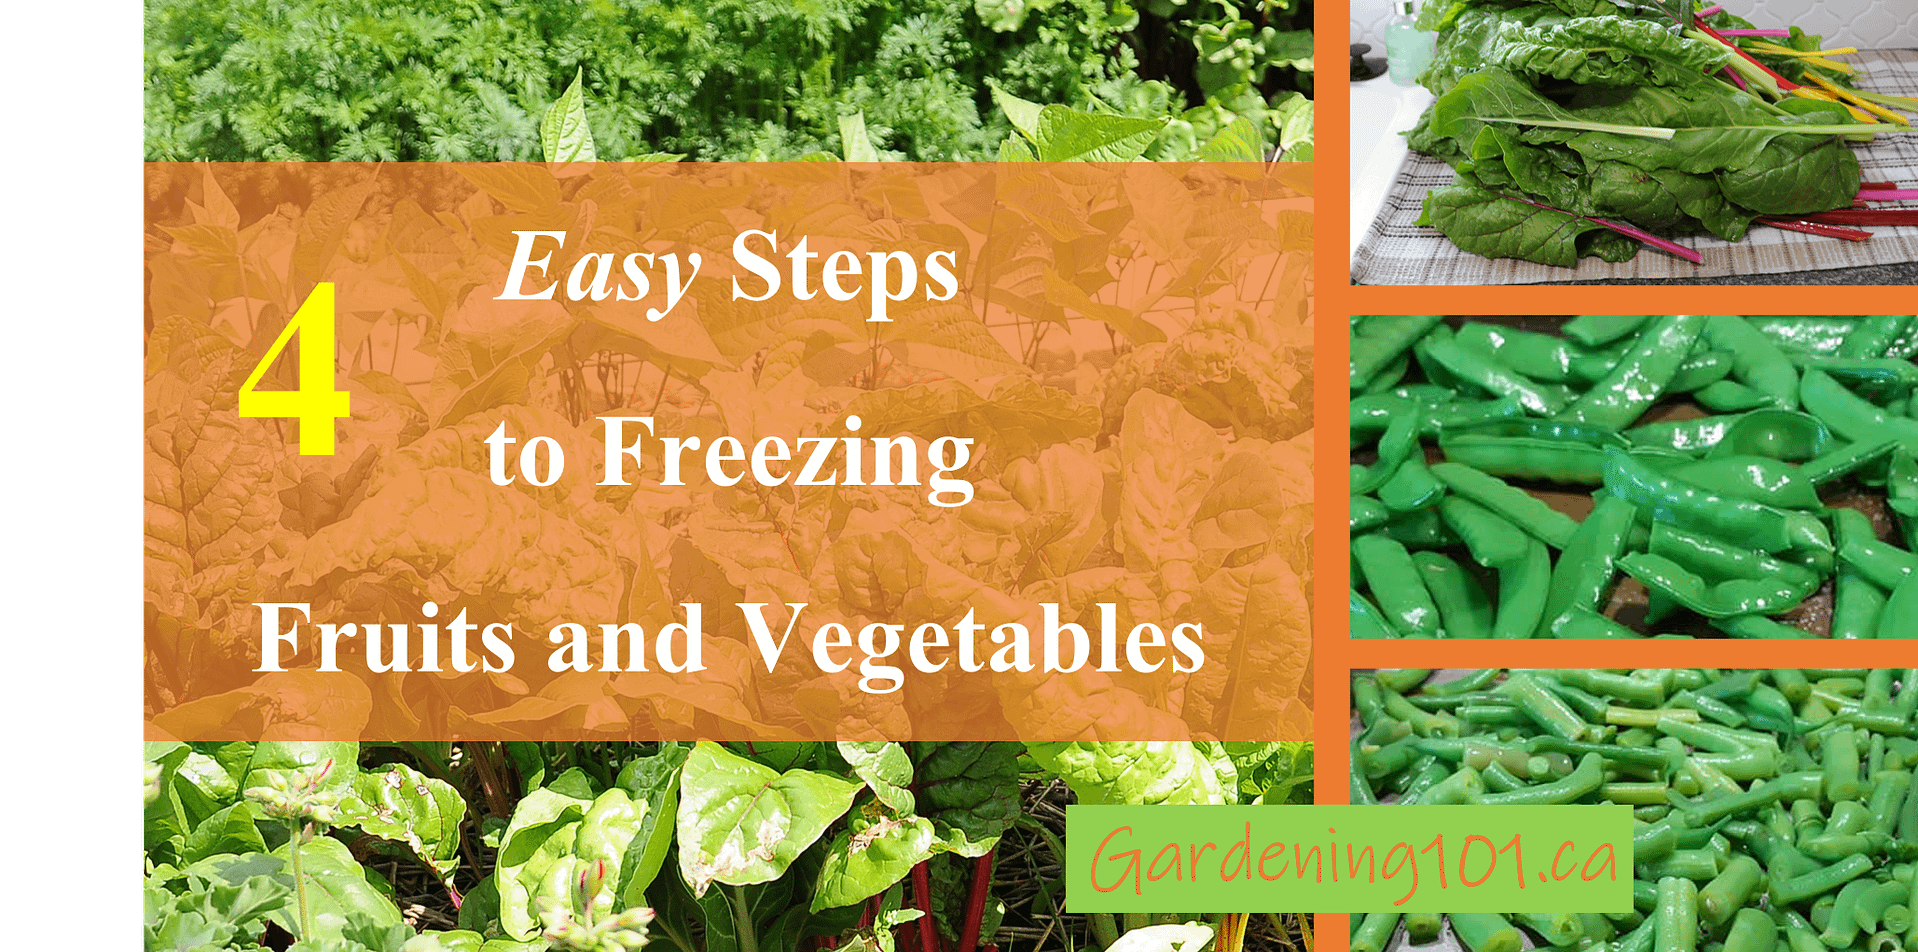
It’s harvest time! Fresh vegetables and fruit packed with flavour, vitamins, and freshness. So good. You want to save all of that tasty goodness for the cooler months just around the corner, don’t you? Freezing fruits and vegetables locks in that flavour and freshness.
Why Choose Freezing?
There are many ways to preserve your harvest, from canning, to baking and cooking, to dehydrating or freezing. Freezing is one of the simplest ways to keep your fruits and vegetables for many months. It doesn’t require a lot of equipment or expertise. It’s safe and easy to do.
Follow these four easy steps to preserve all of that fresh from the garden flavour. You can jump to the how to summary, but I suggest reading through the reasons behind each step so you can avoid the common mistakes many beginners make and ruin their harvest.
Step # 1 Blanch Your Vegetables
This first crucial step is often missed! Before you freeze your vegetables, you have to blanch them. If you have skipped this step before and thrown your vegetables straight in the freezer, you likely wondered why your vegetables tasted awful after a while. Maybe you haven’t heard of blanching or don’t know how to do it.
I have put together a post on how to blanch vegetables that walks you through the steps. Make sure you check it out before proceeding.
Here are some FAQs on blanching that you might find helpful.
Citric Acid Powder
Citric Acid Powder controls browning, improves shelf-life of jerkies, and freezer life of fruits. Add to your canning or drinks. Use as a natural cleaner.
Step # 2: Flash Freezing
Don’t Skip This Step!
Fruit and vegetables contain a lot of water in their cells. When they are frozen that water turns to ice. A mistake many people make when freezing blanched vegetables or fruit is to throw them straight into the freezer instead of doing this important step first.
Why Should I Flash Freeze My Fruits and Vegetables?
Foods that freeze slowly get larger ice crystals in them which ruptures the cells and makes them mushier. The faster you freeze your food, the smaller the ice crystals and the better-quality thawed food you will have. This is especially true with fruit because it is often eaten raw from a frozen state. And mushy fruit isn’t something many people like, except maybe bananas…
When you go to use your fruit or vegetables from the freezer you want them to be easy to separate. That way you can take what you need and leave the rest in the freezer. It is not a good idea to thaw and refreeze food because it will get freezer burnt. **Never refreeze meat that has been thawed unless you cook it first.
The longer it takes your frozen vegetables to thaw the less evenly they cook. Throwing a lump of frozen beans in a pot of water will cook the outside first and the inside will still be frozen. This means overcooked and under cooked veggies in the same bowl.
Your blender will thank you too when you make a smoothie if your fruit is separated into smaller pieces.


Half Sheet Baking Pan and Bakeable Nonstick Cooling Rack, Metal
Heavy duty half sheet baking pan with included non-stick cooling rack. Bake right on the cooling rack to suspend foods to make them crispier. Highly rated!

Wait!
Don’t put too many warm (room temperature) fruits and vegetables in your freezer at once! This is another common mistake people make when freezing fruits and vegetables. This warms up your freezer too much, which slows down freezing causing larger ice crystals and more freezer burn on the rest of your frozen food. To prevent this, do your freezing in batches.
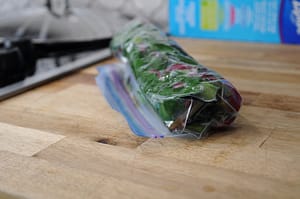
Step #3: Bag Them
Without the proper protection, your fruits and vegetables will still spoil in the freezer. Freezer bags are designed to protect foods from the harsh temperatures of the freezer. Use the right bags and remove air to keep your fruits and vegetables from spoiling.
Later in the post I explain the difference between the type of freezer the food is stored in and how important it is to choose the right freezer or even where in the freezer you store your frozen fruits and vegetables.
Does a Vacuum Sealer Keep Food Fresher than Regular Freezer Bags?
You bet! One of the most effective ways to remove air and prevent freezer burn is to use a vacuum sealer.
The Problem with Vacuum Sealers
The problem with vacuum sealers is that you have to portion your food because once you open the seal, you can’t seal it up again, without a new bag.
This is an easy fix though.
The Solution
The great thing about vacuum sealers is that they make it easy to create portioned size bags. You just cut the bag to the size you need, seal the end, fill it up, and vacuum seal it. I have used a vacuum sealer for over twenty-five years and I swear by them, especially for freezing meat. You will save thousands of dollars in preventing food waste by using one.
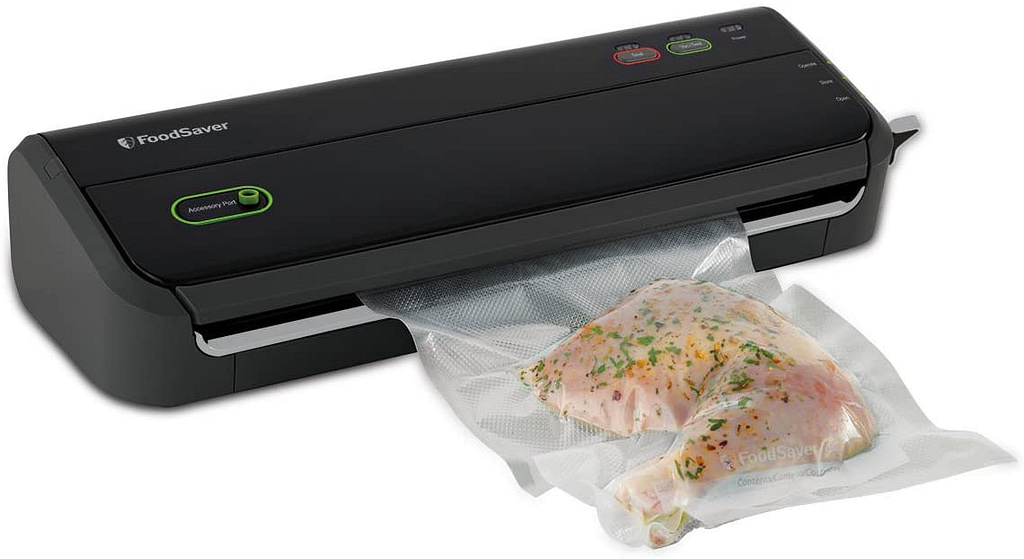
FoodSaver Vacuum Sealing System with Starter Kit
Keep your food fresh and save money. No more freezer burnt wasted food. Easy to use and versatile for different sizes of food.
Step #4: Label Them
Even with the proper blanching and bagging, your food will need to be used up within the next year.
How Old Is That? What Is That?
If you are like me, you convince yourself that you will remember when you froze your fruit and vegetables. I mean, you put so much time and effort into growing, harvesting, prepping, and blanching them, how could you forget when it was, or worse, what it was? And then you do. The easiest way to prevent this is to label your food.

First In, First Out
This is a standard in the restaurant and grocery world. Use the oldest food first, or eventually, you will have to throw out that bag of peas because it became freezer burnt. Labelling makes this much easier.
Freezing your Fruits and Vegetables
Now that you have your fruits and vegetables flash frozen, bagged, and labeled, let’s talk about your freezer.
Your Freezer
Your freezer is the biggest factor in how long your frozen food will last. You may not be able to change the type of freezer you have, but understanding how to store your food in your freezer and what not to do, will help prevent some of the worst damage.
Shut The Door!
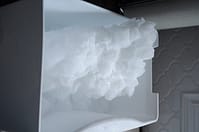
Freezers work best when they are kept closed. By opening them frequently you introduce warm air. The warm air then washes over the frozen food, warming it slightly. This warm surface then draws moisture out of the food and refreezes, causing ice crystals and freezer burn.
The design of your freezer will determine how much warm air enters the cavity each time the door opens.
Location, Location, Location
Store your frozen fruits and vegetables in the middle of your freezer. Do not store them on the door of your fridge freezer. By preventing warm air from reaching them, they will stay fresher longer.
How Long Do Fruit and Blanched Vegetables Keep in the Freezer?
The general rule of thumb is one year from date of freezing – sometimes as little as six months, depending on the freezer, but unless the bag looks like it has thawed and frozen, you should be okay. I found a bag of sugar snap peas from last summer in July and they were just fine to eat. Starting to get slightly freezer burnt, but edible.
If your fruits or vegetables are freezing into a solid lump, that is a sign they have been thawing and refreezing. Use them up soon or they will dry out and become inedible.
Proper storage of your fruits and vegetables will help prolong their freezer life. Using a vacuum sealer and storing them in a chest freezer will keep your fruits and vegetables the freshest, longest.
Summary of Best Practices for Freezing Fruits and Vegetables
In short, follow the four easy steps to freezing your fruits and vegetables, use the proper bags, and store your frozen foods in the coldest part of your freezer to prolong their storage life.
How To in Four Easy Steps
How to Freeze Fruits and Vegetables
- Blanch Your Vegetables
I have put together a post on how to blanch vegetables that will walk you through the steps.

- Flash Freeze Your Fruits and Vegetables
A. Cut your fruit into bite sized pieces. Vegetables are cut before blanching.
B. Drain off excess water and juice. You don’t want there to be too much liquid or your food will freeze into a block.
C. Spread out the pieces of fruit and vegetables on baking sheets in a single layer. Try to keep the pieces from touching each other as much as possible. Place the trays in the freezer, keeping them as level. Freeze solid.
* Shredded or mashed fruits and vegetables are flash frozen in their freezer bags. Keep the layers thin and squeeze out as much air as you can. Don’t drain too much liquid from shredded or mashed fruits as it will protect against freezer burn. But you don’t want them floating in liquid either. Too much liquid makes it hard to break off chunks as needed and slows down freezing.
- Bag Your Frozen Fruit and Vegetables
Once your fruits and vegetables are frozen solid, you put them into freezer bags. Don’t wait too long to do this or you will increase the chance of freezer burn on the exposed food.
Make sure you use bags that are designed for the freezer. Sandwich bags are not thick enough and will allow freezer burn.
Give the bag a squeeze to remove the air and tie off or zip shut. This is important. Don’t leave too much air in the bags or your food will spoil faster.
- Label Your Bags with the Date and Contents
Use a permanent marker. If it is a reusable bag or container, masking tape can be used and removed when washing.


Ready to try out some of the Harvest Time Recipes with your fresh produce?
Did you find this post helpful? Let me know in the comments below. Please share with your friends and family!
